While in the Philippines, I need to get a two-month tourist every two months. It’s easy to do because the closest immigration center is only 40 minutes away. The issue is the cost of obtaining the visa. While living in the Philippines is cheap, I still want to save as much money as possible.
This time around, I’m getting the Philippines six-month tourist visa to lessen the cost. The only problem is it can only be issued in the Philippines capital city of Manila.
Saving Money
The yearly cost of a two-month tourist visa is 36,000 pesos at 6,000 every two months. Additionally, there is also a transportation cost of 2,000 pesos for each trip. That total is another 12,000 pesos driving back and forth to the City of Angeles.

The total comes to 48,000 pesos, and that’s not including lunch or water. Don’t go anywhere in the Philippines without a bottle of water.
A six-month tourist visa cost is 15,677 pesos or 31,354 pesos yearly, a savings of 4,646 pesos. That’s about $100 that I’m saving for just the visa.
The travel cost is much lower since I only need to make two trips to immigration in Manila a year. The total transportation cost is 4,000 pesos instead of 12,000, a savings of 7,000 pesos or $150.
Total savings is 11,646 PHP or $250.
Saving Time
Between travel time and waiting on a visa extension, you’ll spend a whole day. You’ll also need to fill out paperwork before arriving at immigration.

A two-month visa will take six days a year, while a six-month visa will take only two days a year. If you ever spend the day at immigration, you’ll understand what I mean. It’s not a pleasant experience. There is a good possibility you’ll stand for hours.
Contacting Manila
Contacting the immigration office in Manila is easy. You can set up an appointment using their website here. Scroll down and click on online appointment on the left-hand side of the webpage.

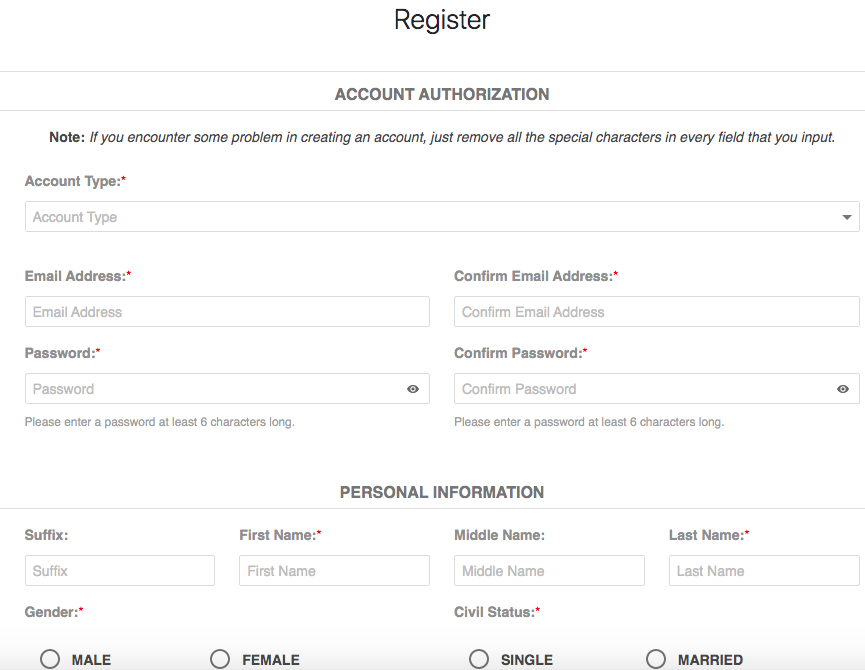
On the next page, click on book online. Sign in with your email address and password if you already have an account, or click on register to make an account.

Making an account is simple and takes about three minutes. After creating an account, return to the sign-in page and sign in.

After you log in, choose the service you need and the date and time for the appointment. The date will have a red box around it if there are available appointment times. Click on the date, and a box will open with available times.
Pick the time and confirm the appointment. A page with the reference number will pop up for you to print. Take the printed paper with you to the meeting.
Follow Up
I’ll follow up with another article after my appointment and give you the details.
Read another article here.
Have you been to the immigration office in Manila? Let me know how your visit went in the comment section below.
Do you have questions about the information in this article? Would you please leave your question below in the comment section?


