
The Philippines government has changed the current travel ban to allow Philippines Nationals spouses to enter the country without an escort. Before the change, any foreign spouse required their Philippines spouse to escort them and any children into the country.
The Philippines national spouse must apply for a visa and follow the guidelines set forth by the Philippines government to enter the country. The website for these guidelines is here.
Returning Home
I’m a citizen of the United States of America, but I’m a resident of the Philippines, and I live in Japan. It’s a complicated lifestyle requiring a lot of paperwork and time. It’s the way I want to live and requires much effort.
My wife left for the Philippines in September to attend school and visit family. She has been in Japan for four years without visiting home. I have been unable to secure a job with visa support, so I will leave Japan early to be with my wife. When she completes school, we will return to Japan.
Obtaining a Visa
I secured a Philippines visa a few months ago. See that story here. However, it has since expired, so I need to apply for another one. The last time I was able to apply in person, but now the rules have changed, and only mail applications are accepted.
My last visa process ended in disaster because I couldn’t board the flight and turned into a complete waste of time and money. This time I made sure the Philippines embassy was aware of the issue to board the flight. They made adjustments to the requirements so the problem wouldn’t happen again.
Requirements
I’m going to elaborate and clear up issues I encountered while completing the website’s requirements.
Passport – I included my passport so they could add the visa to one of its pages. My passport expires in 2023, so I didn’t need to worry if it was six months or less from the expiration date. I also included a photocopy of the page with my photo and details.
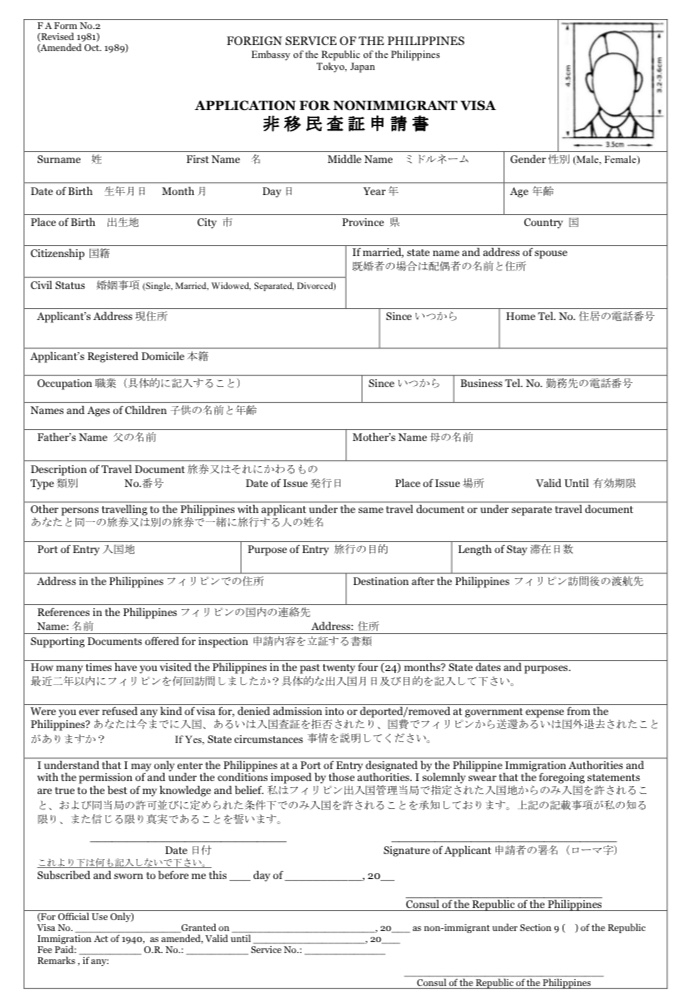
Visa application form – This one-page document was easy to fill out. After the embassy approved the paper, I took it to a notary unsigned.
Photograph – There are several photo booths all over Japan. Usually near a train station. The cost is around $10 for six photos. I didn’t have any glue, but wet rice does the same thing.
Marriage contract – I already prepared this with my last visa, so it was ready. I translated the Japanese language into English and took the original and translated papers to a notary. I signed the translation paper in front of the notary. I received the documents back, along with notarized and apostilled pages.
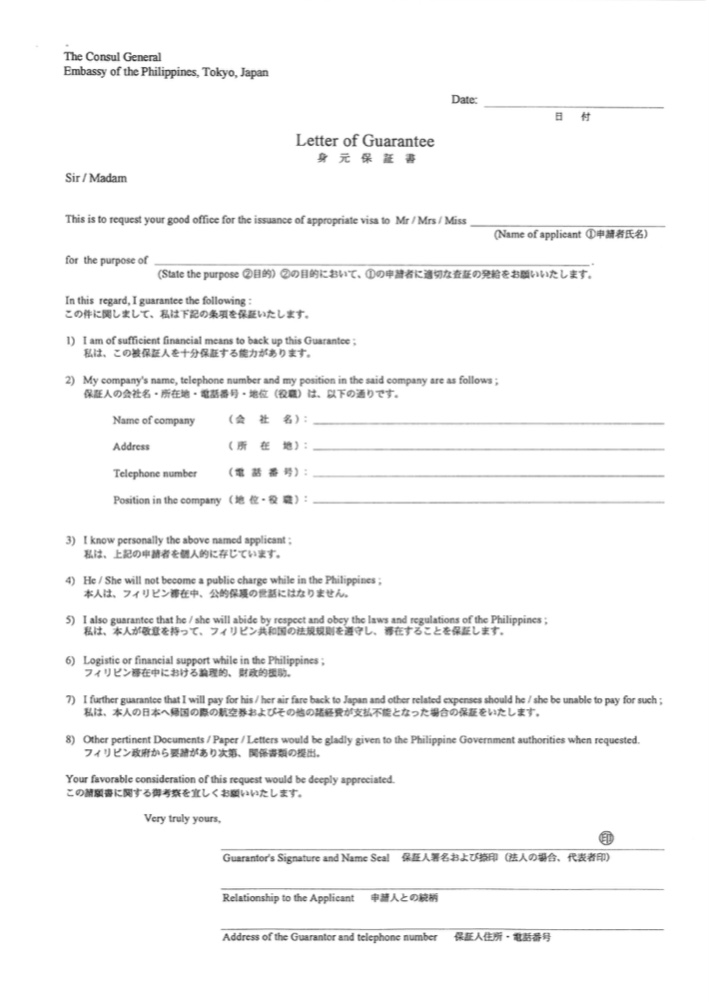
Guarantee letter- My wife filled this out and emailed the finished document to me.
Flight – I sent an initial email with most of the documents finished to the embassy for review before spending money on a flight. Only after I received a favorable return email did I buy my flight to the Philippines. I included this in my final email to the embassy for their review.
Hotel Stay – I booked my hotel stay right after my flight. Seven days in a Phillippines hotel doesn’t cost that much but be sure to read the reviews before booking. Some hotels on the list have stories about rats and unclean rooms. Spend a little more to get quality.
Requirements Continue
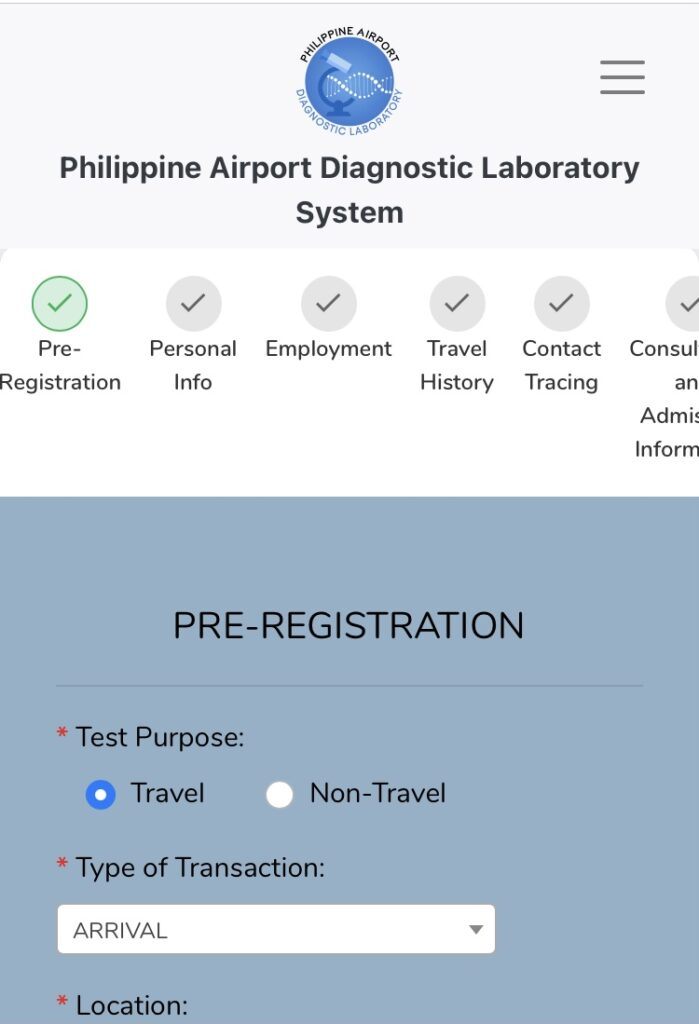
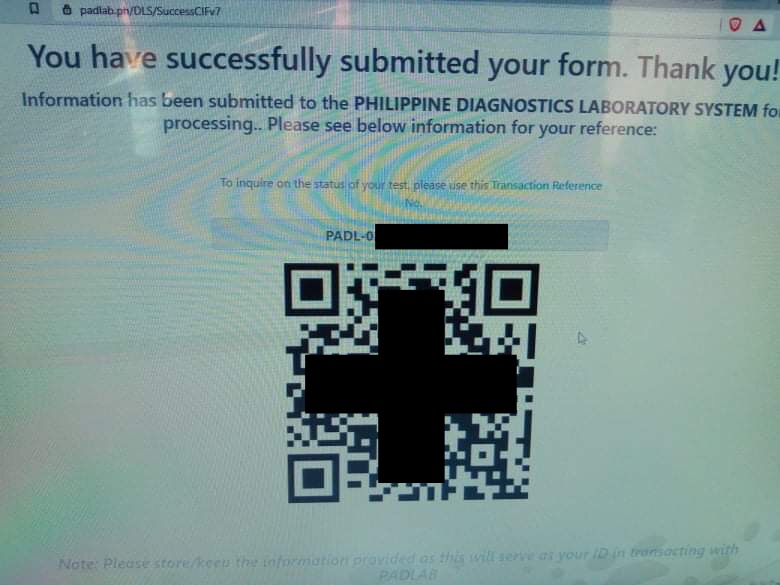
Testing Provider – I pre-booked my testing provider and received a bar code that the airport security will scan after I land. After six quarantine days, the provider will arrive at my hotel room to test me.
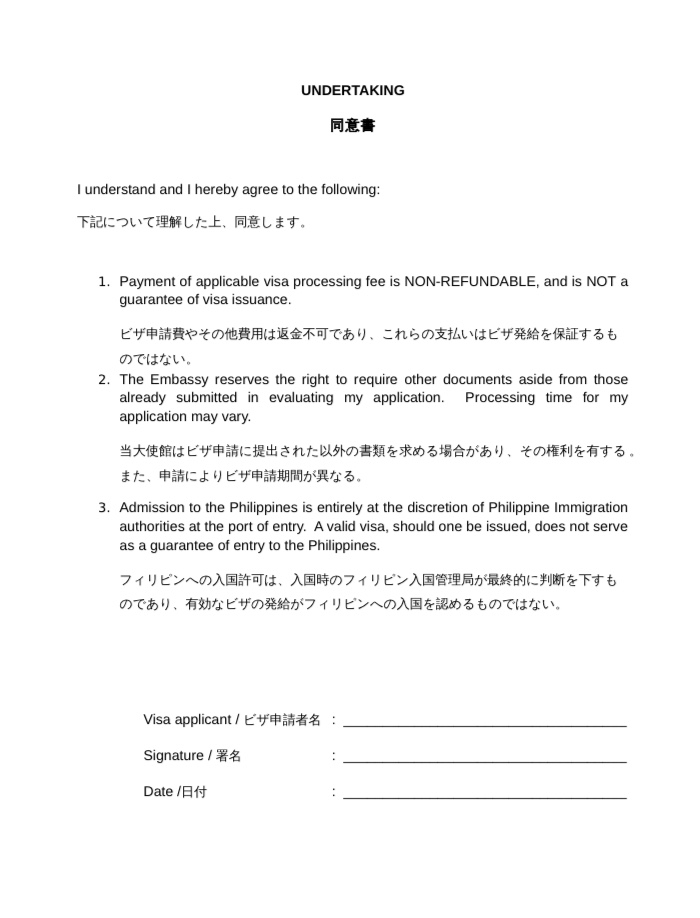
Letter of Undertaking – I signed and dated this document, and it absolves the embassy of any wrongdoing. If I still can’t get on the plane this time, I lose all my money again.
Proof from my wife – I needed evidence that my wife was already in the Phillippines, so I made copies of her plane ticket and immigration stamp from her passport.
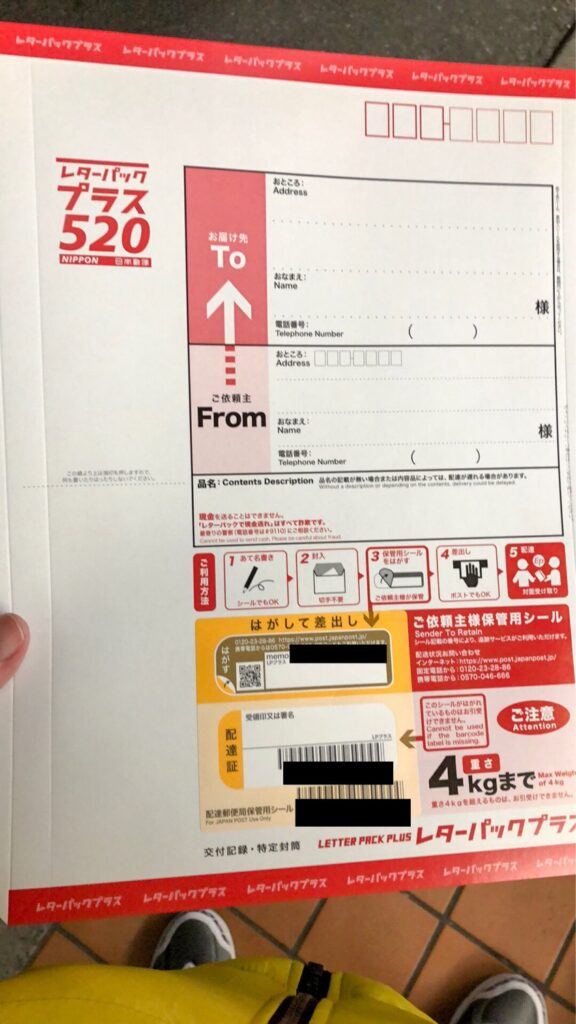
Extra Letter Pack – The above documents, including my passport, fit in the 520 letter pack. What some people don’t understand is that you need to buy another 520 letter pack. Address the extra letter pack to yourself, fold in half, and included it with the documents and passport.
Don’t make extra copies of anything until after the Philippines embassy says the mail-in review is okay. Make only the minimum copies required to email for consideration.
Mail-in Review
When all the forms and paperwork is complete, It’s time to email a picture of everything to the Philippines embassy for approval. I cannot mail my letter pack until the embassy says everything is okay.
Looking over their review, I saw that I still needed to complete several things, but I was on the right track. I wanted them to check my progress before spending money on a notary seal, flight, and seven-day hotel room.
After clearing up the problems, I visited the notary.
Notary
I have previously had my marriage certificate translated, notarized, and apostille, so I didn’t need to do that step. The process cost ¥11,500, so I’m glad the embassy took my previous one.
The notary will watch you sign the documents, so don’t sign the application until you are in front of the notary. If you sign the form before going to the notary, they won’t help you.
I wanted to save money, so I went to a local notary. They would not help me because I was a foreigner. Unfortunately, this is common in Japan, so I decided to take the train for an hour to Roppongi and paid another ¥11,500 for the notary.
I made a copy of all three pages and added the original and copies to the letter pack.
Mail the Letter Pack
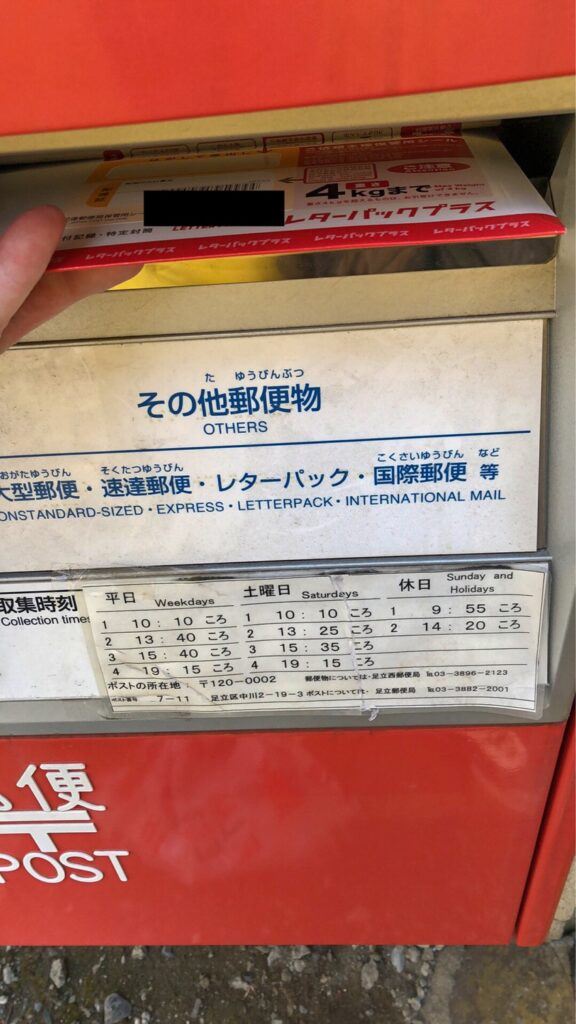
After emailing my updated paperwork with the notary to the embassy, they gave me the green light to mail the letter pack. I didn’t seal the letter pack until I made a final check in front of the mailbox.
Payment
After mailing the letter pack, I visited the local post office and asked for a Genkin Kakitome. It’s a small envelope used to send money through the mail.

No account number is needed, so use the Philippines embassy address.
Email Receipts
I emailed the embassy the letter pack and payment receipts. They started processing my visa immediately.
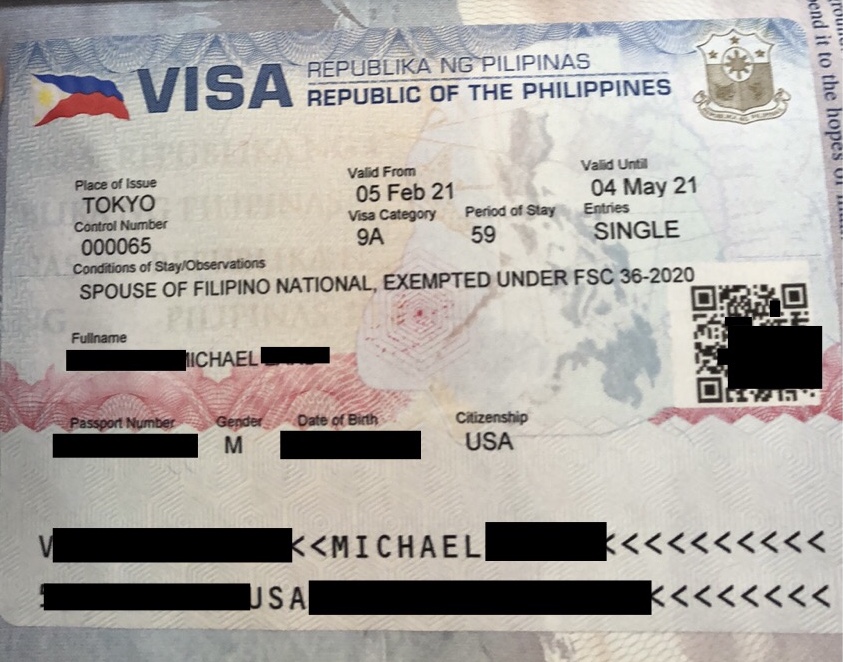
Visa Received
My passport with visa arrived after two days on a Sunday. I checked all the information to make sure it was correct then sent a picture to my wife. She was happy.
Easy?
While this process seems easy on paper, it is not. It’s stressful and requires a lot of work and money. Don’t wait until the last minute to start the process. It took me 1.5 weeks to get everything done.
Have you requested a visa for the Philippines? Let me know what you had to do in the comment section below.
Do you have questions about anything on this page? Please ask your question in the comment section below.
Very Informative.
Thank you!